Author: admin

  • Further work on my Three Tier Go Wide-Game-Bot

    I’ve had less time over Christmas to work on it, but am progressing. My relationship with Claude Code is turning more supervisory. I’m often generating sample code and infrastructure/patterns for it to follow. “Make me a new Team Store like my User Store”.

    This way I have set up the working pattern for Domain, Store, Busines Layer and Presentation. I now have a strategy which I believe is more maintainable and allows for testing.

    The Domain Layer – Static Stores

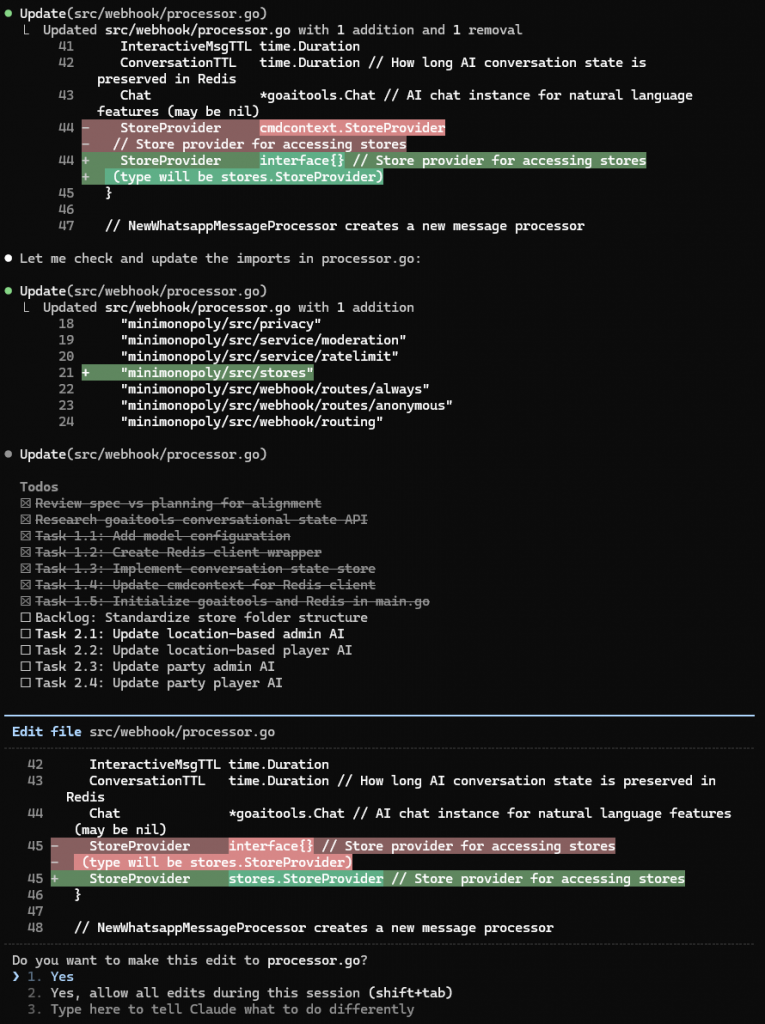
    The first infrastructure made by Claude had used dependency injection to pass store interfaces down through the layers. This resulted in a StoreProvider interface to reduce the amount of parameters to pass around, and a lot of effort. Changes I’ve made:

    • My Stores are packages full of static methods.
    • My CommandContext interface has been broken out into specific HasGormTransaction and HasRedisConnection. The stores are coded to accept the one (or both) they need. This makes testing easier. (In my first article, Experiments in Go – Three Tier Architecture in a WhatsApp Game-Bot, I discussed how I use a Command Pattern to place control of transaction boundaries outside the business functions)
    • I have a library of support code to make working with Gorm consistent and easier.

    The idea is that the business layer should not be dealing with Gorm directly.

    An example Store

    This is the header of the User Store and the first method, GetById. The majority of the work is performed by the lower layer stores package. I’ve wrapped the Not Found error into a more specific userstore.ErrNotFound`. That’s likely the most complex piece of code here.

    Go
    var (
    	ErrNotFound = errors.New("user not found")
    )
    
    type QueryOption = stores.QueryOption[domain.User]
    type PreloadOption = stores.PreloadOption
    
    func WithPreloadCurrentGame(options ...PreloadOption) QueryOption {
    	return stores.WithPreload[domain.User]("CurrentGame", options)
    }
    
    func WithPreloadLastControl(options ...PreloadOption) QueryOption {
    	return stores.WithPreload[domain.User]("LastControl", options)
    }
    
    func WithPreloadLastControlLocation(options ...PreloadOption) QueryOption {
    	return stores.WithPreload[domain.User]("LastControlLocation", options)
    }
    
    // GetById returns a user by ID. Returns ErrNotFound if the user is not found.
    func GetById(ctx cmdcontext.HasGormTransaction, userId uuid.UUID, options ...QueryOption) (*domain.User, error) {
    	allOptions := append([]QueryOption{stores.Where[domain.User]("id = ?", userId)}, options...)
    	user, err := stores.First[domain.User](ctx, allOptions)
    	if err != nil {
    		if errors.Is(err, gorm.ErrRecordNotFound) {
    			return nil, ErrNotFound
    		}
    		return nil, fmt.Errorf("get user: %w", err)
    	}
    	return user, nil
    }

    The store also provides methods to mutate the User. I’ve had to use the non-generic Gorm API here because the generic API does not make it easy to update set fields. There’s an issue raised against Gorm about this problem.

    Go
    // SetContextToPlaying sets the user's current playing context to playing the given game.
    // This store function does not validate that the user is a player of the game.
    func SetContextToPlaying(ctx cmdcontext.HasGormTransaction, userId uuid.UUID, gameId int64) error {
    	updates := map[string]interface{}{
    		"current_context": cmdcontext.UserContextPlaying,
    		"current_game_id": gameId,
    	}
    
    	err := ctx.GormDB().Model(&domain.User{}).
    		Where("id = ?", userId).
    		Updates(updates).Error
    
    	if err != nil {
    		return fmt.Errorf("set context to playing: %w", err)
    	}
    
    	return nil
    }
    

    How the magic works – the Stores package

    Gorm’s generics interface is more typesafe. This includes different interfaces (gorm.Interface[T] and gorm.ChainInterface[T]) at different stages of the query building process. This makes using the Options Pattern harder. Here’s my Options structure:

    Go
    type QueryOptions[T any] struct {
    	FirstOption FirstOptionBuilder[T]
    	Options     []ChainedOptionBuilder[T]
    	Clauses     []clause.Expression
    }
    
    type FirstOptionBuilder[T any] func(db gorm.Interface[T]) gorm.ChainInterface[T]
    type ChainedOptionBuilder[T any] func(db gorm.ChainInterface[T]) gorm.ChainInterface[T]
    
    func NewQueryOptions[T any]() *QueryOptions[T] {
    	return &QueryOptions[T]{
    		FirstOption: nil,
    		Options:     make([]ChainedOptionBuilder[T], 0),
    		Clauses:     make([]clause.Expression, 0),
    	}
    }
    
    func BuildQueryOptions[T any](options []QueryOption[T]) *QueryOptions[T] {
    	result := NewQueryOptions[T]()
    	for _, opt := range options {
    		opt(result)
    	}
    	return result
    }
    
    func (q *QueryOptions[T]) HasFirstOption() bool {
    	return q.FirstOption != nil
    }
    
    func (q *QueryOptions[T]) AddChainedOption(opt ChainedOptionBuilder[T]) {
    	q.Options = append(q.Options, opt)
    }
    
    func (q *QueryOptions[T]) AddClause(c clause.Expression) {
    	q.Clauses = append(q.Clauses, c)
    }

    This results in options that have to be more intelligent about the kind of Builder that they create. Here’s the Where option

    Go
    // Where creates a Query that applies a WHERE clause to the query
    func Where[T any](where string, args ...interface{}) QueryOption[T] {
    	return func(opts *QueryOptions[T]) {
    		if !opts.HasFirstOption() {
    			opts.FirstOption = func(db gorm.Interface[T]) gorm.ChainInterface[T] {
    				return db.Where(where, args...)
    			}
    		} else {
    			opts.AddChainedOption(func(db gorm.ChainInterface[T]) gorm.ChainInterface[T] {
    				return db.Where(where, args...)
    			})
    		}
    	}
    }

    I also have options for locking and preload. Preload takes a varadic list of PreloadOptions to customise preload.

    One of the stores.Query method is

    Go
    // BuildQuery builds a query from the given options
    func BuildQuery[T any](ctx cmdcontext.HasGormTransaction, options []QueryOption[T]) (gorm.ChainInterface[T], error) {
    	var db gorm.ChainInterface[T]
    	opts := BuildQueryOptions[T](options)
    	for _, opt := range options {
    		opt(opts)
    	}
    	if !opts.HasFirstOption() {
    		return nil, fmt.Errorf("stores supporting layer does not support unbounded queries")
    	}
    	db = opts.FirstOption(gorm.G[T](ctx.GormDB(), opts.Clauses...))
    	for _, opt := range opts.Options {
    		db = opt(db)
    	}
    	return db, nil
    }
    
    // First executes a query and returns the first result
    func First[T any](ctx cmdcontext.HasGormTransaction, options []QueryOption[T]) (*T, error) {
    	db, err := BuildQuery(ctx, options)
    	if err != nil {
    		return nil, err
    	}
    
    	var record T
    	record, err = db.First(ctx.Context())
    	if err != nil {
    		return nil, err
    	}
    
    	return &record, nil
    }

    I wonder why Gorm copies structs all over the place, so I return a pointer. The error about unbounded queries is forced because this method would have to return a different interface depending on whether any options had been given. All of my cases provide at least a Where option so I won’t hit this error.

    How it looks in the business layer

    This is possibly one of my most complex business calls and is part of the Player Leaves Team business method. I need the player’s current team. I also need to know how many other players the team has so that when this player leaves the team I know whether to withdraw the team from the game.

    I also load the game here so that I have information about the game to report back to the user. This business method returns a structure which contains information such as the new team status (playing/withdrawn/completed), any penalty the team will suffer for not completing the game and the team and game names for use in user facing messages.

    Go
    // Load the team with members (excluding me) and game info
    team, err := teamstore.GetByUserAndGame(ctx, userId, gameId,
    		teamstore.WithPreloadMembers(
    			stores.WhereP("user_id <> ? AND status=?", userId, domain.MembershipStatusActive)),
    		teamstore.WithPreloadGame())

    I could write a function in teamstore to WithPreloadActiveMembersOtherThan(myUid). This may be a good idea as information about field names has leaked into the business layer here.

    Go
    // Load the team with members (excluding me) and game info
    team, err := teamstore.GetByUserAndGame(ctx, userId, gameId,
    		teamstore.WithPreloadActiveMembersOtherThan(userId),
    		teamstore.WithPreloadGame())

    Unit Tests with Mock Database

    The static stores mean that I cannot mock out the store layer any more. I need to test against a database. I’m using the in-memory mysql driver to do this. It’s faster, but it risks errors due to differences between the mysql driver and the real Postgresql database. The biggest risk is constraints.

    The core infrastructure is a builder

    Go
    type SetupCommand interface {
    	Name() string
    	Command() Visitor
    }
    
    type Builder interface {
    	// WithFurtherSetup creates a new builder with the given setup commands in addition to the existing ones
    	// The existing builder is not modified
    	WithFurtherSetup(...SetupCommand) Builder
    
    	// Build creates a new MockDatabase instance
    	Build(t *testing.T) MockDatabase
    }

    Two builder types exist. The Root Builder (rootBuilder is private to this package) has only the list of commands. The Chained Builder has a parent Builder and more commands. This allows me to create a Builder to create the schema I need and another Builder which adds to this with test or test group specific data.

    In practice it looks something like this:

    Go
    // testBuilder creates a builder with all necessary tables for user store tests
    var testBuilder = dbmock.NewBuilder(
    	dbmock.WithUserTable(),
    	dbmock.WithGamesTable(),
    )
    
    var seededTestBuilder = testBuilder.WithFurtherSetup(
    	// Seed data using command builder pattern
    	dbmock.NewCreateUserCommand("user1", func(u *domain.User) {
    		u.PhoneNumber = dbmock.StringPtr("+1234567890")
    		u.DisplayName = dbmock.StringPtr("Test User")
    	}),
    	dbmock.NewCreateUserCommand("user2", func(u *domain.User) {
    		u.PhoneNumber = dbmock.StringPtr("+9876543210")
    		u.DisplayName = dbmock.StringPtr("Second User")
    	}),
    	dbmock.NewCreateGameCommand("game1", "user1", func(g *domain.Game) {
    		g.Title = "Test Game"
    		g.GameCode = dbmock.StringPtr("TEST001")
    		g.Status = domain.GameStatusActive
    	}),
    )

    The test then uses the builders:

    Go
    func TestGetById_BasicLoad(t *testing.T) {
    	// Setup
    	mockDB := seededTestBuilder.Build(t)
    	ctx := mockDB.NewContext()
    	userID := mockDB.GetValue("user1.ID").(uuid.UUID)
    
    	// Execute
    	user, err := userstore.GetById(ctx, userID)
    
    	// Assert
    	require.NoError(t, err)
    	require.NotNil(t, user)
    	assert.Equal(t, userID, user.ID)
    	assert.Equal(t, "+1234567890", *user.PhoneNumber)
    	assert.Equal(t, "Test User", *user.DisplayName)
    	assert.Equal(t, cmdcontext.UserContextInactive, user.CurrentContext)
    	//...

    It’s more useful to look at the Team Member setup command, as this shows how commands depend on eachother.

    Go
    // CreateTeamMember creates a test team member with default values
    func CreateTeamMember(db MockDatabase, teamID int64, userID uuid.UUID, overrides ...func(*domain.TeamMember)) *domain.TeamMember {
    	member := &domain.TeamMember{
    		TeamID:   teamID,
    		UserID:   userID,
    		Status:   domain.MembershipStatusActive,
    		IsLeader: false,
    		JoinedAt: time.Now(),
    	}
    
    	for _, override := range overrides {
    		override(member)
    	}
    
    	err := db.DB().Create(member).Error
    	require.NoError(db.T(), err, "failed to create test team member")
    	return member
    }
    
    func NewCreateTeamMemberCommand(key string, teamKey string, userKey string, overrides ...func(*domain.TeamMember)) SetupCommand {
    	return NewSetupCommand(fmt.Sprintf("create team member %s", key), func(db MockDatabase) error {
    		teamID := db.GetValue(teamKey + ".ID").(int64)
    		userID := db.GetValue(userKey + ".ID").(uuid.UUID)
    		member := CreateTeamMember(db, teamID, userID, overrides...)
    		db.SetValue(key, member)
    		db.SetValue(key+".ID", member.ID)
    		return nil
    	})
    }
    

    The pattern of storing key and key.ID allows joins to work.

    I’ve used test helper systems in work and they really do thelp. The system I wrote at work for a large project went a layer beyond this. I could ask for any business object and the system would default all of its dependencies for me, so here I’d ask for a Team Member and, unless I overrode them, I’d get a User and a Team and a Game automatically. Here I need to set up the User, Team and Game but this is not hard. The test helper framework is quite simple as a result.

    Business Layer – Back to Command Objects

    My business layer has returned to using Command Objects over Command Functions. To be fair, I could have likely stuck with functions. The use of objects has allowed a simple mocking framework for presentation layer functions that call a single business method.

    Go
    var mocks = make(map[reflect.Type]any)
    
    // GetMock returns a mock of the given type and returns true if it exists
    func GetMock[T any]() (T, bool) {
    	typeT := reflect.TypeOf((*T)(nil)).Elem()
    	mock, ok := mocks[typeT].(T)
    	return mock, ok
    }
    
    // SetMock sets a mock of the given type
    func SetMock[T any](mock T) {
    	mocks[reflect.TypeOf((*T)(nil)).Elem()] = mock
    }
    
    // ClearMocks removes all registered mocks
    // Should be called in test cleanup (defer) to prevent test pollution
    func ClearMocks() {
    	mocks = make(map[reflect.Type]any)
    }

    My business function uses a factory method to create the Command instance. For example

    Go
    // LeaveTeamCommand removes the player from the team and returns information about the new state of the team.
    // It will execute team state transitions as a result of the last player leaving.
    // It will execute user context state transitions, setting the user to idle if they are currently playing in this team.
    type LeaveTeamCommand interface {
    	cmdcontext.Command
    	Result() *LeaveTeamResponse
    }
    
    // NewLeaveTeamCommand constructs a New LeaveTeamCommand for the given user and game.
    // It will return a mock instance if one is set.
    func NewLeaveTeamCommand(userId uuid.UUID, gameId int64) LeaveTeamCommand {
    	mock, isMocked := cmdcontext.GetMock[LeaveTeamCommand]()
    	if isMocked {
    		return mock
    	}
    	return &leaveTeamCommand{
    		userId: userId,
    		gameId: gameId,
    	}
    }
    

    The mock is not aware of the parameters passed here. I could improve the framework with a factory pattern that accepts the parameter list and returns a mock instance, or support assertion to capture the parameters. This can all come. For now this simple framework allows me to test my presentation layer without the mock database if I want.

  • JetBrains Junie AI for Go

    I’m impressed. It seems to understand Go better than Claude, so move over Claude! I just wonder how much use I have on my personal license.

    To see how it’s handled writing unit tests look at this commit.

    https://github.com/m0rjc/goconfig/pull/17/changes/eb7c04fa90b9dd47f32b30dddf9b3775c04c9c25

    This was achieved with a fairly simple prompt. I’ve made some manual changes, added some more cases to the tests, but the structure it’s used is easy to work with. My initial prompt was

    Markdown
    Can you create unit tests in the process package which, for each type we handle, call the process.New method and run the resulting process. (So you'll need a StructField to apply reflection on). We're interested for each one that we prove we can read a valid rawValue into the type, that we handle invalid input (like reading 'foo' as an integer), and that the validators work (min, max, pattern). Order them with the _types.go file so number_types_test.go

    It’s nice to work with a proper IDE, unlike VSCode for this. I can run and debug individual test cases include parameterised test cases:

    Looking at a test file with buttons I can press to run or debug inidivual tests

    I have one click access to coverage with the normal highlights in code, which has helped me to ensure that I am testing all cases.

    Code coverage shown in the left margin. I’m not testing the system with a custom parser and no default handler

    The test that I need to complete this coverage was largely written using the AI code assistant. I had to help it along a little, but it generally got the idea.

    New test for a custom type parser, showing the run test dropdown

    One more test to write to bring the coverage up. Clearly I need to learn to start a new task in Junie as it still shows me as working on its initial setup task.

    Junie user interface adding a unit test

    Now I’ve tested the process package I can have Junie work on the main package. I’ve deleted all of Claude’s tests and asked Junie to test the functionality of the system.

    A nice thing is that it’s found a missing feature, a means of using this tool that I hadn’t envisaged, and put in a fix. I wonder how easy it will be to have the system not instantiate a nested struct if no keys for that struct are available or some other decision. This would be a future story.

    Junie amending config.go so that it can handle nested pointers to structs

    It’s not all bad for Claude

    Junie is very much an assistant. I’ve not tried large tasks with it yet, but it helps me very nicely.

    I can’t see how to interact with Junie while it is running. There doesn’t seem to be away to look at a proposed change and stop the process there with instructions to correct. I can hit the big stop button, but not review as I go. Maybe there’s a button I need to find to enable this. It’s not been a problem for small tasks.

  • Go Config Tools

    Go Config Tools

    Both in my professional work and mow my own projects I’ve seen Claude makde huge complicated CONFIG loader routines. Wouldn’t it be great if I could load configuration from the environment just as I unmarshal a JSON structure. The code would be so much easier to read and maintain.

    So I’ve done just this at https://github.com/m0rjc/goconfigtools.

    I’m adding capabilities to custom validate and, I expect, custom marshal values. This will give very nice compact configuration for my Kubernetes projects both at home and at work.

    As an aside – Claude didn’t understand that you could add a varags parameter to a method without breaking existing clients. This explains why goaitools has methods like NewClientWithOptions() rather than just NewClient() with the additional varargs.

  • Working on an open source module for a closed source system

    My large person project is the Wide Game Bot. This is a pretty complex system involving WhatsApp, OpenAI and Kubernetes, Postgres, REDIS and Cloudflare currently sitting on a DELL 7070 Micro in my home office. It has already successfuly branched out into a different kind of wide-game, the Scouts Christmas Party Planning Wide Game, and work on our location based urban wide game continues.

    The system has two components which I wish to open source. This is as much as a demonstration of my abilities without revealing my main intellectual property, the game system. There is also the hope with all open source that these things become useful in their own right, and maybe they can grow more as open source than I will achieve on my own.

    Go AI Tools

    Go Ai Tools is at https://github.com/m0rjc/goaitools. This provides connection to OpenAI, a tool calling Agent loop and support for message state tracking.

    Go WhatsApp

    Go WhatsApp is not currently released, although it exists as an independent module in my codebase. I use a redirect in the go.mod file to allow local development. It currently does not support egress rate limiting and does not understand message receipts. These are critical requirements for a production system, and without them I don’t believe I can release this code to the public.

    Switching Hats – The difference between two worlds

    My work on the bot is quite experimental really. I’ve built it up, torn it down, thrown Claude Code at it. I’m working with a system with flaws that I’ll get to fixing as I go. It’s very much an early days research style project which is allowing me to rapidly iterate, test and come back and reiterate.

    My work on goaitools is like wearing a different hat. Even though it’s still a pre-release version (currently v0.3.0) I’m working to Stories. I’m ensuring that tests are in place at every step, something that’s already served to reign in Claude when it gets things wrong. I’ve tried to make the tests behavioural and wonder if I can tell Claude in its CLAUDE.md that it should always be this way. There is documentation. There are samples, which are also system tests. There is a backlog and release plan.

    AI tools make large changes relatively cheap, but I am trying to build goaitools properly, with isolated components and separation of concerns divided through small interfaces. This is more how I have worked in my day job. It reall feels different to the wide game bot.

    Which is better?

    It’s a good question. Wide-Game-Bot can evolve rapidly. It accepts a mess. One day I’ll make those hard component boundaries (before it becomes too messy) but I’m heading there incrementally. GoAiTools feels slower because I’m being more thorough. When I wear my goaitools hat I’m no longer the bot developer. My interest is in that library and my other self is very much on the other side of its boundaries. I don’t compromise GoAiTools for the bot project.

    Claude and large intertwined codebases

    I may have to compartmentalise the wide game bot sooner rather than later, as Claude struggles to cross compartments. This is resulting in a lot of “stabbing in the dark” as it tries to make changes.

    Claude Code screenshot showing Claude changing its mind about a variable declaration.
    An example of Claude stabbing in the dark on the AI Bot project.

    I think things like this would be reduced if the codebase was made of smaller components with well defined boundaries. The components exist in my head, but rapid work with Claude has been less disciplined. An issue is managing dependencies.

    I’ve seen the same with human teams working under pressure and it comes back to the same question about developer discipline and maintaining structure in a project. Why does processor.go know about conversation TTL anyway? Its job is to route requests to the right agent, not to be the agent itself. Claude, like a human team, degrades if the system is allowed to become messy.

    Unit Tests

    I’ve seen Claude correct itself quickly due to failing unit tests in GoAiTools. At least component tests, verifying the contracts between system parts, allow errors to be spotted sooner.

    So which is better?

    So to answer the question of which is better – the stricter work on GoAiTools may feel slower, but I think in the end it wins out for the same reason that maintaining developer discipline and looking after tests wins out in traditional projects.

  • The Return of the Stores

    .. in which I go almost full circle (or spiral upwards perhaps) in the implementation of my Go based WhatsApp Wide Game Bot

    Back in the article Three Tier Archirecture I discussed how I was moving away from a Stores based architecture for my database access layer towards just using GORM. I was concerned about the amount of boilerplate SQL code that was being generated (admittedly largely by AI) so thought that an Object Relational Manager could solve this for me. I’ve used Hibernate in the past. Maybe I could just write my business logic to work over GORM.

    The business layer uses a Command Pattern. This allows control of transaction lifecycle to be taken out of the business logic, and allows business logic elements to be composited as needed. A Command can call a Subcommand and inherit its transaction scope, with the Commands completely unaware of how transactions are managed. It’s a great separation of concerns.

    Go’s packages are large flat namespaces in their own rights. My flattened domain package was steadily being cluttered my methods like GetOrCreateUser(), though perhaps this should have been a Command. Also I want to move some of my domain into REDIS, for example the Memento System for short term memory in the system. Mementos handle questions like “If the user pressed WhatsApp button with ID abcde-1234-abcdef when was this generated and what does it mean?” My solution has achieved three things:

    • I now have Store classes which group methods by domain type, for example domain.UserStore.GetOrCreateUser().
    • These methods are Command Methods in my Command Pattern framework, so they composit into business logic commands naturally.
    • I can easily swap my Memento Store for a REDIS Memento Store. I can also start using REDIS caching in my User Store if I need to, but this system is not struggling to scale at the moment!

    Start From The Top – The Command Pattern for Business Methods

    Traditionally Command was an object (or interface) and Command Pattern in the Gang Of Four Design Patterns is more about storing what was done and being able to replay or undo commands. (Some may be thinking of Event Sourcing Frameworks here too). The Command Interface in this system has a method, Execute() which takes a Command Context that holds the database transaction and any other data I add. In this case I add user information that is frequently referred to, allowing me to read the user record once at the start of the incoming request handler.

    When using an interface for Command, we have a Command Runner that accepts the Command, creates the transaction, calls the Command, then commits or rolls back as appropriate. The Command instance is set up with the data it needs and, after completion, holds any result.

    Modern languages support lambdas, the ability to pass a function along with captured state. C had function pointers. Lamdas add the ability to enclose values as well. It’s very powerful, and allows for a Command in this pattern to be a Lambda.

    The pattern to call a business logic command is the same as that to call a Store Method under this new pattern. Here’s a call to business logic to either switch the current user into an admin context or create a new user as admin for a game. It handles the “/admin” command in my widegame bot

    Go
    result, err := cmdcontext.Run(request.BaseRequest, gamecmd.AdminSwitch,
      gamecmd.AdminSwitchRequest{
    		Caller:        caller,
    		User:          request.UserContext(),
    		GameCode:      gameCode,
    		AdminPassword: password,
    	})

    BaseRequest acts as a context for the whole call. It holds the Go Context as well as a request ID for logging and the framework Executor instance which holds the database connection pool. gamecmd.AdminSwitch is the function to call. The single argument is a request object and the result is returned alongside error following normal Go patterns.

    I’d have liked Run to be a method on Executor, but Go Generics do not support methods. It has to be a static function call.

    The signature of gamecmd.AdminSwitch is

    Go
    func AdminSwitch(ctx *cmdcontext.CommandContext, req AdminSwitchRequest) (*AdminSwitchResult, error) {

    CommandContext provides the current database transaction, and soon to be REDIS connection for upcoming REDIS stores.

    A Command can composite another Command by calling it directly, passing down its CommandContext. It can similarly call a store method (which is just another Command) the same way. I’ve migrated the Party Web Server so will show an example of calling a Store method directly from the top layer. This jumping of layers from presentation to domain is fine here – saves me writing mid-tier Commands that just delegate straight to a domain method. A Party is a type of Game in a system that was created to play urban wide-games.

    Go
    	// h is the HTTP handler instance for the Party Web API server
    	// h.gameStore() is a convenience method to read h.storeProvider.GameStore()
    	// h.storeProvider is an interface that is a subset of the central StoreProvider.
    	// partyapi.StoreProvider declares the stores required by the Party API Server.
    	// Go's interface matching allows me to do this. I can unit test the handler with
    	// the smaller subset of mock stores that it needs.
    	game, err := cmdcontext.Run(req.BaseRequest, h.gameStore().GetByGameCode, gameCode)
    	

    A Tradeoff

    If I have a store per domain object, then I load each store one at a time. For example in the Party Bot I may

    Go
    // pseudocode
    party := PartyStore.getPartyById(partyId)
    food := FoodStore.getPartyFoodByPartyId(partyId)

    If I allow GORM into higher layers then I can join or use subselectes. Maybe the optimisation is to provide these joining methods in the stores. In which case does PartyStore also provide the methods for the food? After all, food is part of a good party! Where do we draw our lines?

    Go
    // pseudocode
    partyWithFood := party.Store.getByIdWithFood(partyId)

    If Party was not just some small special case of Game (or if this system grows into the next Mega-Online-AI-Powered-Party-Planner) then Food may become its own little domain area with so many other methods.

  • Working with AI

    Working with AI

    I’ve been working with multiple AI tools both professionally and in my own time for a while now. At home I have a personal Claude Pro account and use Gemini on the web as well as my own OpenAI developer account. I have used OpenAI to help with tasks (“You are an expert in planning activities for Scout Groups....“) and programatically in projects like the WhatsApp Party-Bot. Gemini does research for me and can help with code snippets and understanding, somtimes giving a second opinion to Claude. Claude is my main code assistant.

    It’s certainly helped with rapid prototyping and iteration on a project. I was able to work on the Party-Bot, adding features and fixing things on a live system as I received user feedback. Party-Bot now has a traditional web page too, for those who don’t like the conversational UI. This was all built in hours.

    Some of my working patterns

    My employer uses SpecKit. This reminds me of the old days before Agile when we designed and specified projects! We turned a project around this way. My first project with Polk was a restart on a failing project. We spent weeks planning it. I developed my reputation as “A Danger With Whiteboards” due to the amount of UML that I drew on them. Management worried about time spent without any code being written, but when we wrote the code we delivered a fully functioning system in less time than the failed project had wasted. The system was also robust to change as customer requirements came in.

    Agile has always been “mini waterfalls”. I like to point to pictures of Aysgarth Falls in the Yorkshire Dales. In my time leading the Foundations Team in FinancialForce (now Certinia) I’d spend the first half day or day of a sprint with those whiteboards. We’d work on specifying exactly what we were going to implement.

    A beauty of this is that any questions that arose could be dealt with before we all went away and worked. Everybody knew what they were doing. I’d insist on what I consider to be “mathematically correct systems” in which we knew what the definition of the system was. Some Agile purists disagreed, wanting strict focus on the User Story at hand. We could design the system with clear contracts allowing differerent developers to split work and come together later – and it all worked in the end!

    My WhatsApp Game Bot framework has reached the stage where different teams could go off and implement different subsystems all independently now – but there’s only one of me on this! I’ve been here before. “You need a team. You don’t scale on your own”. The bot can only be split because I have driven Claude to write a modular architecture. If you let it make spaghetti then you cannot factor out parts this way.

    Mini-Waterfalls with Claude

    Claude tends to create a SpecKit like Story structure, even without SpecKit installed. I’d have it work with me on the research and specification, using Planning Mode to help me work out and write the story. I’d then write the story file and write a planning and task list.

    Writing out tasks lists allows me to start afresh in a new Claude Context. Context costs, because we’re paying for tokens. It also can slow things down, and I’ve found that if you give Claude too much information it’s more likely to go wrong. Claude has to be told to tick off tasks as it does them, or it forgets. Keeping the task list up to date allows for better recovery should the session be lost for any reason.

    I switch between policing every change that Claude offers and letting it rip with a review at the end. A lot depends on how confident I am with the specification. Policing every change allows me to trigger a change in direction if I see something I disagree with. This saves a big refactor later. Letting it rip could mean not having the work quite as a I’d do it, but having something working then deciding whether to refactor or not. I’ve not had Claude go wildly wrong. It’s easier to delete a broken AI generated branch in Git than it is to tell a team member a day before the end of a Sprint to rework everything!

    Habits to Change

    This is how I work with humans. I ask a question even though I know the answer. With humans I may keep asking to get to the point. I want the person I’m helping to work it out so that they understand.

    I ask Claude "Looking at the GameType and UserContex I
think GameType can be a string throughout the system as it's registry based now, so we lose the
enum from the domain layer too. UserContext isn't going to grow though. We could marshal back and
 forth, or do we define it lower down in cmdcontext and refer to it from domain?"

Claude answers
"Good architectural question! Let me explore how these types are currently used to make an informed recommendation."
    Asking Claude questions, not just giving it commands

    This wastes tokens when I’m working with an LLM. I know what I want. I should just demand it. In this case Claude came to the same conclusion that I’d already reached. This was to correct a decision that Claude had made earlier as part of a large refactor, in which it was marshalling enums across the layers. You can’t have switch statements on Game Type buried in multiple parts of the code when all that matters is that Game Type is read from the database and used to find the correct Game Strategy based on name.

    Like hitting a golf ball down a course, if you’re not Tiger Woods

    The AI isn’t perfect. It doesn’t do things the way I would. But then am I perfect? Definitely not! Development of any system is iterative. I like to think of it like hitting a golf ball down the range. I’m not particularly good at aiming golf balls so I’ll hit off to the side a few degrees or tens of degrees, but the aim is roughly right and I’m moving forward at every stage. I then need to go find the ball and hit it again trying to correct.

    The Dynamics of Refactoring

    One of the fundamental promises with Agile Development is that we can refactor. The idea is that we must spend time collecting the technical debt that we accrue. Ideally we should allocate time to keeping on top of this and maintaining the system. This is hard to do in a business environment that is always under pressure to deliver. The business wants features. Refactoring is not feature delivery.

    Not refactoring is false economy. The system degrades such that working on it becomes slower and more expensive. A good system with good separation of concerns, sensible dependencies, SOLID design is easier to work on. I’m trying to keep the Game-Bot this way because time spent making that foundation allows for faster iteration down the line. If the foundation is good then all I need to do is write the new feature business logic or the new Web presentation layer. I think Party-Bot is going to become primarily a web interface built on top of the same Domain and Business layer as its WhatsApp incarnation.

    As Foundations Team leader I kept “Richard’s Red Refactor List” of things I wanted done to maintain the system. We allocated time, sometimes a whole sprint, to clear that list. This kept a system that was easier to work on. Nowadays we have a Technical Backlog in JIRA and pull technical stories into the sprint as needed.

    Claude makes refactoring cheaper than it was. Will that still be the case when Claude has made delivering features cheap? I think this will level out. In a team situation we’ll still be potentially disrupting work for a large refactor, so the task of coordinating in a team remains. Claude does remove a lot of the grunt-work – the rippling of change through the codebase if you change a low level interface that everything depends on. (Back in my Java days I found Eclipse’s refactor tools were great for this. I’ve not seen anything comparable in any other IDE since.)

    Currently, for this sole developer, refactoring is cheap – or relatively cheap. There’s still an Opporunity Cost…

    The Claude Rate Limit Options dialog. What do I want to do? Stop and wait or pay for more access?
    The Claude Rate Limit Dialog – Stop and wait or pay for more?

    The plight of the Junior Developer?

    £18 per month for Claude Pro is significantly cheaper than a junior developer! This cannot be denied and its impact on the industry is going to be profound.

    Claude still needs guidance. My job remains safe – for now. Perhaps it always will, or will for long enough for me to reach retirement, because a fundamental need in software engineering is to nail down requirements. User wants are often fuzzy. Computers, even Claude, need definite rules to determine what the system must do. They need that “system definition”.

    So what happens when all the seniors retire? Who will take our place? Who will have learned the ropes and gained the experience? Who will be able to tell Claude it’s made a massive security hole or be able to drive it towards laying out that scalable system with its well designed components?

    Maybe AI is just the next Industrial Revolution or Communications Revolution. I lived through the 90s and saw the last one. We take the web for granted now – it’s such an invisible part that underpins so much that a UK political leader once pondered whether the state should be as responsible for ensuring access as it currently is for roads.

    Maybe the next junior developer will be someone entering the workplace ready to use the new tools, as a past engineer may have entered the workplace ready to use a CNC machine tool (or MATLAB for the kind of stuff I studied). AI is an automation. Improvements in tooling for the physical world have increased scale. Consider the robotic warehouses we see now. But automation also impacts jobs.

    I think the biggest question is whether demand will keep up with increase in supply, as software engineers become capable of doing more in less time.

  • Writing the Party-Bot

    Writing the Party-Bot

    This will be impressive if it works! Using Claude to write a party food organising bot on top of my wide-game-bot framework!

    I’ve extended the framework to allow a Game Type to choose the “command routing” taken by the system. It already had fixed command routers depending on player context, “Admin”, “Player”, “Idle” and “Anonymous”. Now I add a concept of a RoutePair which means that my wide games will go to “location-base-game/admin” and “location-based-game/player“. These remain the same, but I add a new “party/admin” and “party/player“.

    These routes both inherit the “always” route which allows for joining and leaving a game, and then implement only an AI Assistant. The assistant has tools to get the party menu and allow a player, er…., participant to specify what they are bringing.

    Players Participants can only see their own food and that someone else is bringing crisps and nibbles. The game admin can see the entire menu alongside who is bringing what.

    This is a great thing about Strategy Pattern. I’ve just added a new Game Type Strategy which plays a very different game to anything I imagined when I started this project.

    Findings as I implement this

    Teams!

    The existing games are in teams. The architecture assumes that a player is part of a team and a team is in a game. This means that party participants also have to be in teams! This could work well. “The Smith Family” could have both parents contributing to the same food list. It also means that a participant chooses their display name. I was going to use their WhatsApp display name. The system uses AI to moderate these. I’ll have to have the AI moderate their food choices too!

    Other people’s ideas?

    I imagine other people are solving the problems I’m solving. I’ve never had a SimpleToolAction, but the idea here is interesting and maybe I can learn from it.

    I should have stuck to Stores

    I discussed store pattern in Experiments in Go – Three Tier Architecture in a WhatsApp Game-Bot and decided to move from a Store pattern with manual SQL to using Gorm directly in code. I’m learning now that I should have stuck to Stores, and will write up more on this later.

    Claude keeps looking for Stores. I don’t know if that’s from remains of documentation about the pattern in the codebase docs folder, or because everyone does Stores. The final architecture would be Stores with Gorm based store implementations but that will be a large refactor (oh no not again!). I’m finding the domain package is filling up with Store methods. I also want to be able to swap in things like a REDIS store for objects like the mementos used to track multi-step user conversations.

    A Prompt Injection Attack! (Sort of)

    I’d initially intented it not to be possible for participants to see who was bringing what. In retrospect this was an anti-feature. People are discussing this over WhatsApp in the Parents Channel. When I wrote the wide-game-bot I’d designed the player tools to make it impossible for the AI to do anything the player should not do or access information that the player cannot access. Claude’s rapidly written “list_food” tool returns the food items along with the name of the teams that bring them.

    I noticed this when a parent asked me to add a food item on their behalf. So I added specifically “Crisps (Eliot)”. The AI then started including team names for all of the other items in brackets when listing foodstuffs!

    So my food item was

    JSON
    {
       "food":"Crisps (Eliot)",
       "team":"Sparks and James"
     }

    Every other item was

    JSON
    {
      "food":"Drinks",
      "team":"The Smiths"
    }

    The AI formatted that one as “Drinks (The Smiths)“.

    It’s an easy bug to fix, but I’ve not fixed it because I think it’s actually a feature. If Claude had followed my original intent and prevented acccess then I’d have been tempted to add it in!

    My wide game players still cannot see whether territory is owned by any other teams before entering it and risking a penalty, or in the simple Score game they cannot see which bases have been claimed already.

    Conclusion

    I have a party-bot. It was developed very quickly, a few hours including refactoring the Game Strategy to allow complete user input routing override through the existing Command Router System and debugging.

    Testing the new bot as an admin using my Simulator test-harness
    Testing the bot using my simulator test-harness command.

    I have a lot of technical debt and a large TODO file to clean it all up.

    I’m about to test this all for real by sharing it with my Scout parents!

    Is Conversational AI the new User Interface?

    Using the live system!

    I’ve got used to it and find it natural. Will my users? That’s a big question. This could be crying out for a quick website solution, something which I may well add! Then I’ll have a web site and WhatsApp user interface to the same backend data which will be neat.

    I can imagine a world in which conversational UI is the norm. It seems full circle, back to the command line, but with voice recognition. “Hey – Party-Bot – We’re bringing cake!” – possible now if someone presses the “voice input” button on their phone.

    The web site would also have a place. This is a problem that just calls for tabular data and an “add row” button.

    References

    This is the AI Assistant supporting code from the project:
    https://github.com/m0rjc/goaitools

    I hope to publish the WhatsApp ingress and egress code when it is in some kind of shape to be shared. At the moment it has no egress rate limiting, which is a risk. The chance of me exceeding WhatsApp limits with a small party of Scout parents is low, so I take that risk.

  • My Bot is connected to WhatsApp

    My Bot is connected to WhatsApp

    That was a lot harder than it should be? Or are WhatsApp trying to make a barrier to entry to ward off amateur developers?

    Generate a token to use

    You’ll need a System User with permissions to access your app and the WhatsApp account you are trying to make work.

    I used an admin user which is distinct from the employee user that my app uses. This admin user is given a token for as long as I need it, then revoked immediately that I have finished. I don’t like admin users floating around, but can’t delete it. Revoking its token should be enough.

    Activate the number once it has been set up

    One you’ve registered your number using “Add Number” in the API setup page it will show as “Pending” in Whatsapp Manager. You need to activate it. This is by POST request.

    The PHONE_ID is the phone number ID which you can find in the dropdown in the API setup page where it offers to make CURL requests for you.

    PIN is a two factor PIN that you are creating with this call. It musty be 6 digits. I don’t know if you need to remember it (you can reset it later from the UI). I generated a 6 digit random number.

    Bash
    curl "https://graph.facebook.com/v21.0/$PHONE_ID/register" \
            -H 'Content-Type: application/json'\
            -H "Authorization: Bearer $TOKEN"\
            -d "{ \"messaging_product\": \"whatsapp\", \"pin\": \"$PIN\" }"

    You can check this has worked by performing a GET request. You should see that it is a business number with a webhook, but the webhook won’t work yet.

    JSON
    {
      "verified_name":"The Name You Provided When You Registered",
      "code_verification_status":"VERIFIED",
      "display_phone_number":"--REDACTED--",
      "quality_rating":"GREEN",
      "platform_type":"CLOUD_API",
      "throughput":{"level":"STANDARD"},
      "webhook_configuration":{
        "application":"https:\/\/--REDACTED--"}, 
      "id":"--REDACTED--"
    }

    I’ve set my number to be non-searchable. I don’t want random people contacting it.

    Bash
    curl "https://graph.facebook.com/v21.0/$PHONE_ID/" \
            -H "Authorization: Bearer $TOKEN"\
            -d '{"search_visibility":"NON_VISIBLE"}'

    Subscribe its WhatsApp Account to my App

    This is not enough to allow webhooks. You can use the API to set up the webhooks. Mine is set up in the App Dashboard and that seems enough.

    Find the phone number’s WhatsApp account and read its ID. This is in the Business Suite under WhatsApp Accounts and the ID is near the top.

    A GET request lists the subscriptions. All you need to do is POST with your token.

    Bash
    curl -X POST "https://graph.facebook.com/v21.0/$ACCOUNT_ID/subscribed_apps" \
            -H "Authorization: Bearer $TOKEN"\

    You can then check it has worked with a GET request to the same endpoint.

    References

    Start here:

    https://developers.facebook.com/docs/graph-api/reference/whats-app-business-account/phone_numbers

  • Scouts “Defuse The Bomb” game – Shallow Dive

    Scouts “Defuse The Bomb” game – Shallow Dive

    I’ve been asked how somebody without electronics experience could implement the “Defuse The Bomb” Puzzle Game with the Scouts. This cuold also be attempted by the Scouts as part of their Digital Maker Stage 3 badge.

    The Bare Minimum – Breadboard

    The bare minimum to get this working, without soldering, is a Raspberry Pi PICO with headers and electronics breadboard. You’ll also need a USB cable for the Pico (mine takes Micro-B type) and a computer running the Thonny development environment.

    The software is available on GIT. You can copy and paste this into Thonny and ask it to save it to the Pico as main.py. You may also need to install the pico python library code onto the pi. If I remember correctly Thonny will ask you if you want to do this automatically.

    If you run (green play icon at the top) the software you’ll see it output “Initialising….” in the window at the bottom and nothing else until you wire up the peripherals.

    Using the breadboard

    Electronics prototyping breadboard

    The breadboard is a handy way to develop electronics. You just plug components in and they connect. Most breadboards are like the top section on mine (above the black line). Tracks run across the board, and are numbered 1 to 28 in the main section here. The physical gaps in the board are breaks in the tracks. These are for use with integrated circuits like the Pico. You need to place the Pico facing along one of these gaps and straddling it so that the pins on each side are not connected together.

    My Pico with the headers is currently soldered to my defuse puzzle, so for this photo I’ve found a Pi Pico-W I’d used in a temperature and humidity sensing project. Ignore the wires soldered to it – these are the sensor.

    The end of a Pi Pico held against breadboard with the puzzle wires shown

    The short orange jumper links one of the ground pins (they’re slightly square if you look carefully) on the Pico to the right hand half ot track 26 on my breadboard. I have one of these kits which I’ve had for a long time. Was it really that expensive when I bought it? The flexible wires are something like these.

    Once you have these wires in you can perform the puzzle using the output on the computer screen to indicate success and watch the LED built in to the Pico for the Morse message. It will go out when the puzzle is defused, and stay on if the user fails.

    Buzzer

    Next to add is the buzzer. I’ve used a cheap piezo buzzer I bought from Amazon for the Scouts Communicator Badge. It is rated at 3V to 25V and works well enough at the 3.3V provided by the Pico. Connect positive to pin 1 in the top left hand corner of the Pico. Negative goes to the nearest ground pin which is pin 3.

    LEDs

    If you want to add in extra LEDs you’ll need an LED and a resistor.

    LED and resistor shown in the correct place against a Pi Pico

    Again, I’ve laid the Pico against the board as this is not my version with the headers. The long leg of the LED is on the right in this image, towards the pin (pin 5 on the Pico) which is +3.3V to turn it on. The resistor connects between the short leg (-ve) to the nearest ground pin (pin 3). Notice how I’ve used a gap in the breadboard to break the track. If I didn’t have a suitable gap then I’d have to use jumper wires to link to a spare track on the board.

    The Raspberry Pi datasheet has a diagram on page 4 which tells you which physical pin corresponds to which GPIO number mentioned in the code at the top. You can use this to find the physical pins for the five LEDs, or change them if you wish.

    Calculating LED resistors

    A 100 ohm resistor is fine for this, but note the comment in the code about power management. 5 LEDs at full brightness would exceed the power capability of the board. You could use larger resistors to reduce current, low current LEDs (with larger resistors), or as the software does use pulse width modulation to reduce power. This turns the LED on and off very quickly so that it spends most of its time off. If you want brighter LEDs or more power then you’ll need to use transistors to switch the higher loads.

    A typical LED has a voltage of 2.2V and requires 20mA to light fully. The Raspberry Pi can provide about 8mA if we don’t use the PWM code to dim the LED.

    The voltage across the resistor is 3.3V2.2V=1.1V3.3\text{V} – 2.2\text{V} = 1.1\text{V}

    The resistance from R=V/IR = V/I is R=1.1/0.008=137.5ΩR = 1.1/0.008 = 137.5\Omega. Choose the next highest standard resistor value which is 140Ω140\Omega

    I’ve used a lower value resistor but had to compensate for this in software to reduce the current draw. If you use the larger resistor (safer) then you may need to adjust the value in software. Full brightness is 65535

    Python
    # PWM is used to manage the current draw. We aim for 50mA Max Total
    # across all LEDs in the system.
    # The dimmer light is also less blinding when the user is trying to
    # copy the Morse clue.
    LED_ON_PWM_U16 = 3000

    Moving to Veroboard

    If you want to make this permanent then you can build onto Veroboard. This is a prototyping technology. You’ll need to be able to solder. There are numerous tutorials online. You’ll also need to cut the tracks. I use a drill bit which I turn by hand to remove the copper. This is the under-side of my circuit board. I’ve drilled small holes to act as strain relief on the cables too.

    Battery Connection

    The circuit can run very well from a power bank plugged in to its USB socket. You’ll need to enable “Low Power Mode” on the power bank if yours has it, otherwise there is a chance it will switch off shortly after power on because the current drain from the circuit is too small for its load detection circuit.

    The circuit can be powered from a battery. I’ve used a 3.7V lithium cell designed for use in devices and wired a connector for it on flying leads to the Vsys and GND pins on the right hand side of my board. Best check the data sheet for information about power supply suitability. Also use a cell with built in protection circuitry if using lithium chemistry cells. A short circuit would be incredibly dangerous without!

    Other Links

    My write-up of the evening is at “Defuse The Bomb” Puzzle Game with the Scouts

    A more technical discussion of the code is at Technical Deep Dive on the Bomb Puzzle

  • Technical Deep Dive on the Bomb Puzzle

    Technical Deep Dive on the Bomb Puzzle

    This is a more technical look at the bomb defusing puzzle discussed in “Defuse The Bomb” Puzzle Game with the Scouts.

    Initial Designs – Use a PIC Microcontroller

    My first plan was to use an 8 pin PIC Microcontroller. This would have been adequate for a simple project like this. Sadly I found that when I upgraded the PIC Development software my PicKit3 programmer was no longer supported. I was unable to downgrade the software, so was stuck (unless I could find something running on Linux to access it).

    I had a Raspberry Pi Pico to hand, and in retrospect I believe it was the better solution. It looks the part more and its increased amount of GPIO meant I could add more features. At £4 it’s not much more for a hobbyist than working with PICs and certainly dissuades me from spending over £100 to upgrade my programmer to work with Microchip’s latest software!

    The PIC has excellent low power modes for use in battery equipment with the battery permanently connected, but this is not that kind of project. Current draw for this project was about 30 to 40mA (subject to smoothing on the display of my bench power supply).

    PIC Pin Multiplexing

    It’s worth mentioning how I was going to multiplex 5 wires, an LED and a buzzer on only 6 available pins of the PIC16.

    CircuitLab experiments with switch and LED multiplexing. The LED and its 100R resistor are in parallel with a resistor/switch circuit. Pull-up is via a 10K resistor.

Text reads:
Switch Closed: 0.3V on pin. LED 0.2mA (off).
Switch Open: 1.3V on pin. LED 0.2mA (off).
Chip driving high: 21mA total when switch closed.

    The PIC can light the LED by sending the pin high. It can set the pin to input and read the voltage to detect the position of the switch. The voltages would be fine for a transistor input, but fall outside the sense ranges for a Schmidt Trigger input. The high voltage of 1.3V is in the unknown zone in the middle so this would need the PIC to run the input in analog mode. That will increase the complexity of the programming.

    I could try adjusting resistor values. I’d also have to consider the need to switch rapidly between input and output modes to achieve the logic I achieved with the Raspberry Pi. It would have been a lot of effort, especially in comparison with the ease of programming in micro-python!

    Raspberry Pi Inputs and Outputs

    The Rasberry Pi was simple in comparison with the PIC. It has so many GPIO pins that I could choose pins near to where I wanted my components. The puzzle wires connect between the pin and ground. A “weak pullup” setting is used to provide the resistor to Vdd. This input risks noise with a floating wire, perhaps part of the issue I had with debouncing when using wire cutters on the wires. It is simple though!

    Output is the standard resistor/LED circuit. I used 68 ohm resistors I had in my spare parts kit. In retrospect this is too small. The Pi output is rated at only a few milliamps with total draw from the system power supply around 50mA. Five LEDs all on at 15mA each would exceed this. I used pulse width modulation in software to both dim the LEDs and reduce the current draw. A larger series resistor would have made this design safer. It seems that the Python library I use is using hardware PWM or some kind of PWM firmware that survives application pause from the development environment, so I’m not left with suddenly bright LEDs if the program stops for any reason.

    The Software

    The software is in a single large file. This made working on it in the Thonny development environment easier. It was written in limited time, so less time was spent on modularisation than a professional software project would require.

    The software is based on a state machine. The variable “state” is in fact the input, though the wait routines mean that its value is known as we transition between states in code. The states in code are the main loop, the onLose() and onWin() functions, and the wait_for_reset() function.

    Python
    # This is the answer - the wire GPIOs in order that they must be cut
    BUTTON_GPIOS = [WHITE,GREEN,RED,YELLOW,BLACK]
    
    # Initialise the Button objects to represent the puzzle wires
    wires = [Button(pin, bounce_time=DEBOUNCE) for pin in BUTTON_GPIOS]
    WINNING_STATE = 2 ** len(BUTTON_GPIOS) - 1
    
    # Return the button state in terms of the actual logic levels on the
    # pins as a bit field. The least significant bit is the first wire to
    # be cut. When all wires are connected this will be 0. When all are
    # cut it will be WINNING_STATE which is 31 for our 5 wire system.
    def get_button_state():
        raw = sum(wire.value * 2**index for (index,wire) in enumerate(wires))
        return raw ^ WINNING_STATE

    State is a bitfield in which the bits represent the log levels of the wires in order that they have to be cut. This allows the calculation of next valid state to be made very easily and greatly simplifies the code! (I’d asked Gemini to try this and it made something a lot more complex). We can see from the code above that the system can handle an arbitrary number of puzzle wires.

    Python
    def next_state(state):
        return (state << 1) | 1
    
    def prior_state(state):
        return (state >> 1)
    
    def is_winning_state(state):
        return state & WINNING_STATE == WINNING_STATE
    
    def is_reset_state(state):
        return state == 0

    The main loop is incredibly simple. I added the ability to move backwards through the states in case of bounce/noise induced while using wire cutters on the wires.

    Python
    while True:
        buzzer.value(0)
        print("Initialsing....")
        state = wait_for_reset(state)
        print("Initialised")
        expected = next_state(RESET_STATE)
        state = wait_for_change(RESET_STATE)
        backward_state = RESET_STATE     # Added ability to step backwards to improve debounce
        pico_led.blink()
        while state != RESET_STATE:
            if is_winning_state(state):
                state = on_win(state)
            elif state == backward_state or state == expected:
                expected = next_state(state)
                backward_state = prior_state(state)
                state = wait_for_change(state)
            else:
                state = on_lose(state)

    The win and lose routines are very similar. Sleep a little to allow signals to really stabilise. Set the buzzer on or off as needed. The lose routine stops the buzzer as soon as any change is made. This allows the operator to silence the buzzer easily.

    Python
    def on_lose(state):
        buzzer.value(1)
        print("BOOOOOOM")
        pico_led.on()
        sleep(1)    # Added more pause for debounce
        state = wait_for_change(state)
        buzzer.value(0)
        state = wait_for_reset(state)
        return state

    Polling – Background Tasks

    The Morse Code and blinked LEDs appear as background tasks, yet the Pico cannot multitask and I didn’t see any obvious signs of the timers and features of RTOS on the ESP32. (It may be there, but I was writing this quickly in a cafe).

    This is achieved using timestamps and the ticks_ms(), ticks_diff() and ticks_add() functions. The main polling loops are the wait_for_change() and wait_for_reset() functions. These both take the state on input and return the state on output, a general pattern for any state changing code (on_win() and on_lose() also).

    Python
    def wait_for_change(state):
        new_state = state
        while new_state == state:        
            new_state = get_button_state()
            blinkenlicht_poll(new_state)
            if(state & WINNING_STATE != WINNING_STATE):
                morse_step()
        return new_state

    Each flashing LED has its own timer, so blinkenlicht_poll() polls all of the LEDs having worked out which ones should be enabled.

    Python
    # In class RandomlyBlinkingLED
        def poll(self):
            now = ticks_ms()
            if ticks_diff(now, self.next_poll) > 0:
                self.value = 1 - self.value
                self._output()
                self.next_poll = ticks_add(now, self._calc_delay())
    
    # This is called in a loop
    def blinkenlicht_poll(state):
        for index, led in enumerate(leds):
            flag = 2 ** index
            led.enable(state & flag != flag)
            led.poll()

    Morse Code Routines

    The technique to encode Morse was created for smaller microcontrollers such as the PIC. They allow me to store an Morse letter as a single byte. I’d wondered if I could fit two characters per byte, but some are too long when you start to include numbers and symbols.

    Consider the character C. This is -.-. (dah-dit-dah-dit). If I encode this in binary with dah as 1 and dit as 0 it is 1010. Similarly A is 01 and L is 0100. How can I store this? The answer is to pack it out to a byte, but set the remaining bits to the opposite of the last bit in the character. C becomes 10101111. I then turn this around to be Least Significant Bit first. I’m going to need to shift bits and an Arithmetic Shift Right preserves the value of the topmost bit.

    So playing through the letter C:

    ValueAction
    11110101LSB is 1. Play dah and shift right
    11111010LSB is 0. Play dit and shift right
    11111101LSB is 1. Play dah and shift right
    11111110LSB is 0. Play dit and shift right
    11111111All bits are the same. Stop.

    For A:

    00000010LSB is 0. Play dit and shift right
    00000001LSB is 1. Play dah and shift right
    00000000All bits are the same. Stop.

    The Morse Step routine implements the polling loop and state transition logic for the Morse Code system. A professional project would split this method up. The flow is:

    Morse playback state/flow diagram

    The code that implements the state changes:

    Python
    def morse_step():
        global morseState
        global morseCursor
        global morseCurrentCharacter
        
        if ticks_diff(ticks_ms(), morseNextAlarm) < 0:
            return
        
        if morseState == MORSE_STATE_INTER_CHARACTER:
            morseCursor = morseCursor + 1
            if morseCursor >= len(MORSE_CLUE):
                morseCursor = -1
                morse_sleep(MORSE_INTER_MESSAGE_LENGTH)
                return
            currentLetter = MORSE_CLUE[morseCursor]
            if currentLetter == ' ':
                morse_led_off()
                morse_sleep(MORSE_INTER_WORD_LENGTH)
                return
            else:        
                ordinal = ord(currentLetter.upper()) - ord('A')
                morseCurrentCharacter = MORSE[ordinal]
                morse_play_current_symbol()
                return
        elif morseState == MORSE_STATE_INTER_SYMBOL:
            morse_shift_bits()
            if morseCurrentCharacter == 0 or morseCurrentCharacter == 0xFF:
                morseState = MORSE_STATE_INTER_CHARACTER
                morse_sleep(MORSE_INTER_CHARACTER_LENGTH) # On top of after symbol
                return
            else:
                morse_play_current_symbol()
                return
        else:
            morseState = MORSE_STATE_INTER_SYMBOL
            morse_led_off()
            morse_sleep(MORSE_DIT_LENGTH)